Our Image Creator tool is here for you for whatever you may need—whether it’s to make a banner for your MediaSpot project, label a photo for an upcoming lesson, or crop a picture so it fits into your website, it will get the job done. We encourage you to jump into it and play around, but if you’d prefer some guidance first or have some questions after the fact, continue reading below or watch the video.
To access the Image Creator, you’ll find it under the Media Tools dropdown menu. Here is a run down of the different options.
Open is for opening an image that is already saved on your computer. When you select it, you’ll have the option to add your image as a background or as an overlay. An overlay image acts as an object which means you’ll be able to move it around and adjust it, while a background will be static.
Save to My Media will save your image to your media gallery on the homepage of MyVRSpot.
Zoom allows you to magnify your image so you can see the finer details, or zoom out so you can see the big picture.
The arrow symbols are the Undo and Redo buttons. If you make a mistake, you can quickly undo it or if you decide that actually, that thing you did was pretty cool, you can click redo to go back.
The clock arrow symbol is your history. This allows you to see every step you’ve taken since starting your image creation process. So if you get to the end of editing and you decide it looked better ten or twenty steps ago, you can click that to go back in time.
The last icon on the left is the Objects icon. This will let you see a list of the different objects you currently have in place on your image. From this list, you can drag and drop your objects if you want to change how they are layered on your picture.
Filter: This tool lets you apply preset modifications to your image. You are able to choose more than one and some may have additional options if you select it and it shows a cog wheel icon.
Resize: This allows you to resize your image by percentages or pixels.
Crop: The crop tool has a few preset sizes, but you can also enter in specific measurements for the crop.
Transform: This has options for rotating 90 degrees, mirroring, and free transform.
Draw: This allows you to free hand draw on your image with either your mouse or stylus. You can adjust the brush size, change the brush type, and adjust the color. There are some preset colors, but if you click on the palette icon, it will open up a RGB gradient color picker so you can choose exactly what you’d like to use.
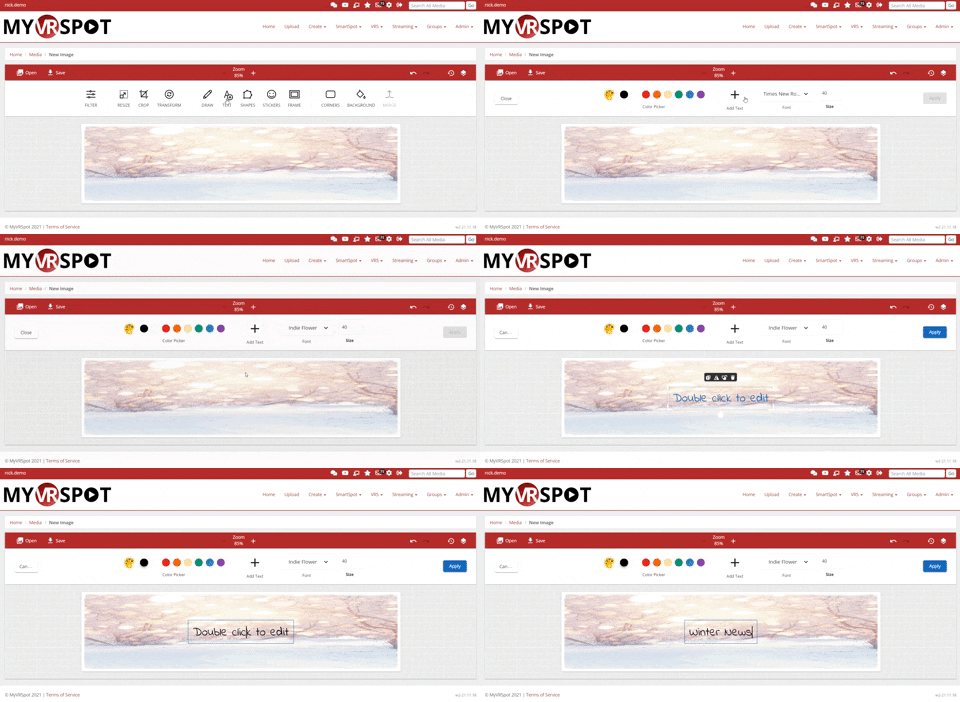
Text: This allows you to add text to your image. You can select a font from the drop-down menu and it has the same color picker system as the Draw tool. To resize your text, click off it so you’re no longer typing. Then click it again and it should have a box around it. You can then resize it by pulling on the corners.
Shapes: This has a whole bunch of pre-made shapes and symbols to choose from. Pick one out, click apply, and then click on your new shape again and you’ll open up options for it like changing the color, adding a drop shadow, or adding an outline.
Stickers: Stickers is similar to Shapes in how it functions. You’ll browse through the image categories, choose one, and then select a sticker. After applying it, you’ll click on your new sticker to view the options for customizing it.
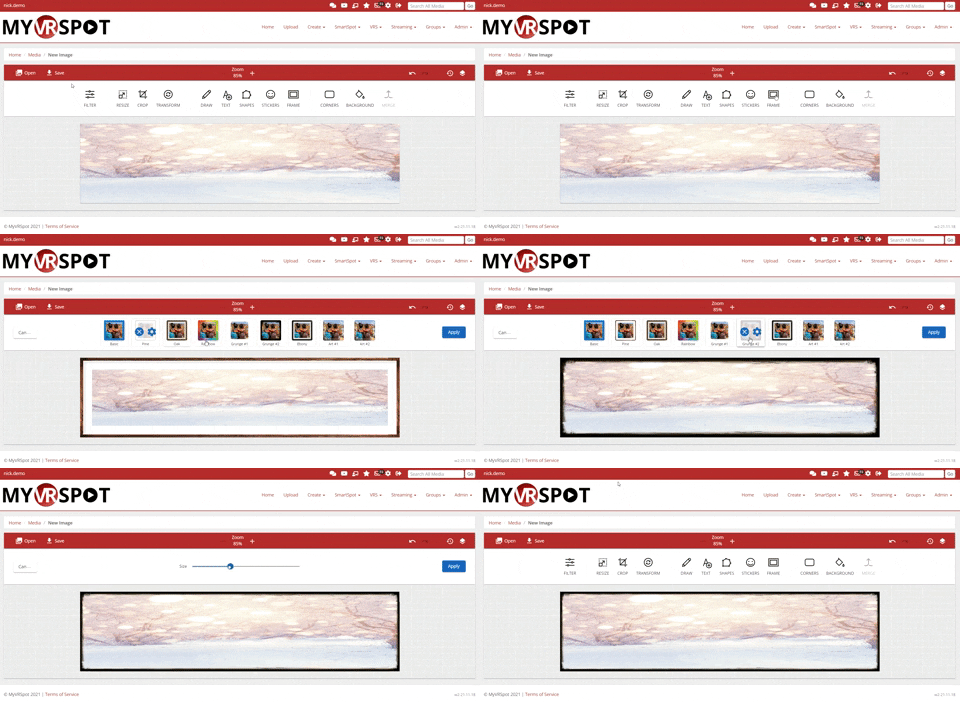
Frame: This allows you to select a border, or frame, for your image. After selecting a frame, it will have an option for adjusting the thickness of it.
Corners: This adds the capability to make rounded corners on your image. When you select it, it has a slider to allow you to increase or decrease the radius.
Background: This changes the color of the background. It has preset colors, but if you click the palette icon, it will open up a RGB gradient color picker so you can choose exactly what you’d like to use.
Merge: If you have an object, like a Shape, Sticker, or Text, that you’re all done with editing and it’s in the perfect spot, you might want to use the Merge tool to combine it with the background. This will make those objects no longer selectable since they will be part of the background of your image now.


