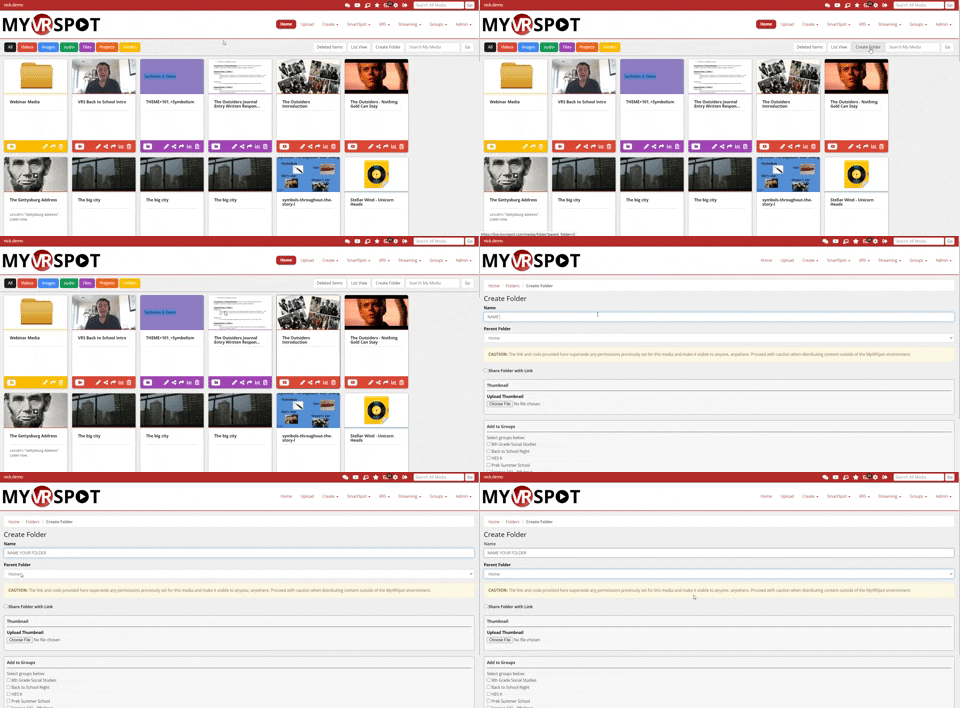
Folders can be created in the gallery to better organize files. Click the Create Folder button in the top menu bar of the media gallery.
Name: Enter a name for your new folder.
Parent Folder: To create a folder that appears in the gallery, leave the Parent Folder option set to Home. To create a subfolder to an existing folder, click the drop down arrow under Parent Folder, and select the folder you’d like your new folder to be in. (ie. If you have a folder called Math, and you want to create a subfolder called Lesson 3, then your parent folder would be Math.)
Share Folder with Link: To share all of the contents of the new folder with others via a URL link, click the Share Folder with Link checkbox. This allows users to share a unique URL link that gives others access to ALL of the contents that are placed in this folder, including videos, images, audio files, documents, etc.
Thumbnail: You can add a thumbnail image to your folder. To do this, click the Choose File button and navigate to find your image.
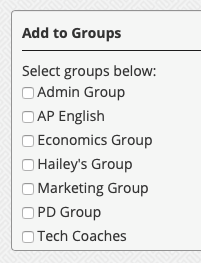
Add to Groups: You can add your folder to a Group, where only you control the content in that folder. To share it to a Group, checkbox the Group(s) you want to share your folder to.
Folder Permission: This section allows users to control who is able to see the content within a folder. Click on the drop-down menu and choose content to be All Users, Private, Group Only, or Teacher and above.
Click the Create button to save the new folder.


