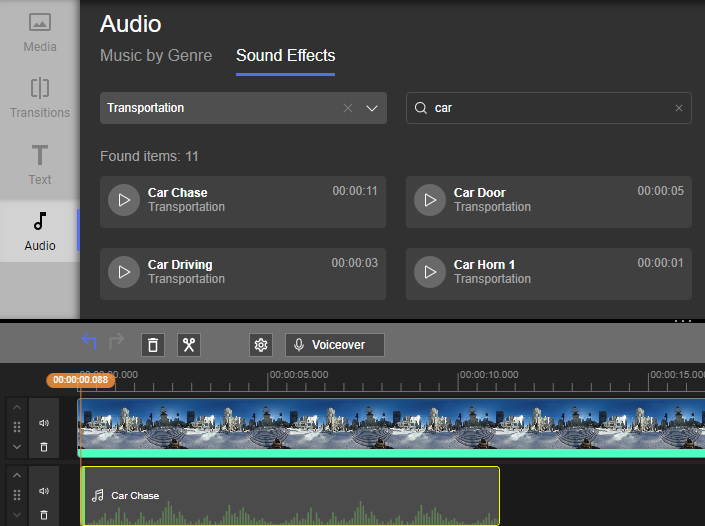
Within the MyStudio, you’re able to add your own audio files from your account to your projects. There is also a voiceover tool to allow you to record yourself on the fly. Additionally, you can choose from a plethora of different sound effects and music files from our audio library.
Your Own Audio Files
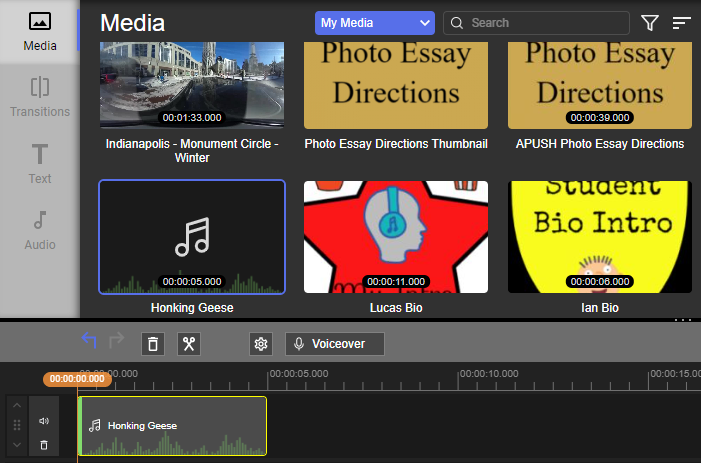
Follow this guide to add audio files from your media gallery:
- Drag and drop the audio file from your media bin into your project timeline.
- If necessary, use the speaker icon to mute your video track(s) and the scissors icon to trim your tracks.
Voiceover Tool
To add a voiceover, follow these steps:
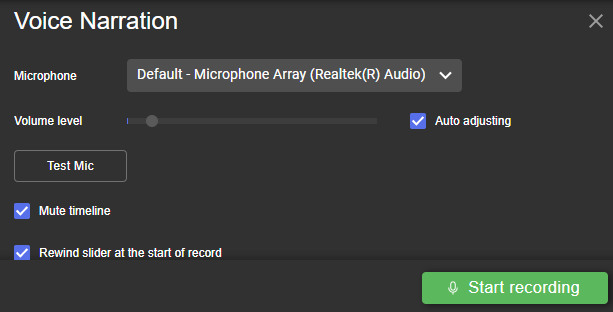
- Click the Voiceover button beneath the media bin.
- If it’s your first time, your browser will ask if you give permission to allow the site to use your microphone. Make sure you accept this, or you won’t be able to record.
- You have the ability to choose your microphone and adjust the volume while testing it to make sure it sounds good to you.
- Once you’re satisfied with the settings, click on the Start recording button.
- When you’re finished, click the Stop button. Your recording will appear on your timeline in your current position.
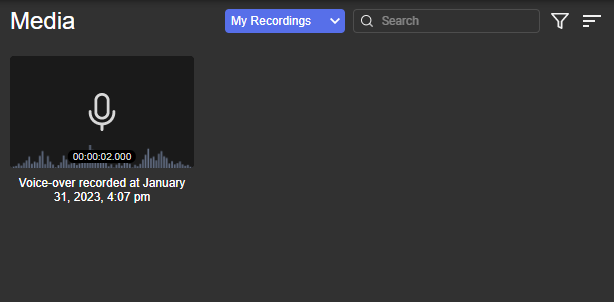
- If you ever delete your voiceover from your timeline and want it back, you can find all your recordings in the media bin under My Recordings.
Audio Library
The audio library has an extensive collection of music, organized by genre, and sound effects, organized by category. To access this library for use with your project, follow these steps:
- Click the Audio button on the left vertical menu.
- At the top, you can choose between the two tabs, Music by Genre or Sound Effects.
- You have the option to browse the entire section, or narrow it down by using the dropdown menu.
- If you know the name of the song or sound effect you’re looking for, you can use the search box instead.
- Once you found something you’d like to use, drag and drop it onto your timeline or you can click on the plus sign to add it to your timeline in your current position.


